Wednesday, 6 September 2023

Shire horse and Dray - Part 1

This ornament of a Shire Horse pulling a Dray belonged to my parents and when I was clearing their house after they passed I decided I'd like to have it as a keepsake. Sadly, during their latter years they weren't able to give such things much attention and so it had been allowed to deteriorate quite badly.

There are many wooden elements of the dray that had come unstuck or had simply broken, but I was fairly confident I could bring them back to a reasonable condition.
 

What I was worried about was the bridle and straps on the horse. They had become so brittle that they fell apart as I touched them. I began by treating the faux-leather straps with a leather conditioner in the hope that they would then hold together better. 

As I began removing/dismantling the horses 'tack' I was very concerned to find that someone had attempted some repairs previously and an excess of contact adhesive had actually glued some of the leather straps to the horses body. Fortunately I was able to careful remove the straps by using a sharp modelling knife, but it did leave the horse in quite a state. 
I also discovered a repaired crack suggesting that one of the legs had been broken off and glued back on. It took quite a while to do but I successfully scrapped away all of the glue without scratching or damaging the body, and I also managed to remove the excess glue from the cracked leg. I touched in with a couple of dabs of acrylic paint just to hide a couple of very small chips and render the repair almost invisible.

Next task, to tackle the harness and straps.

Thursday, 24 August 2023

"Maud": Finished for now

The new pieces I made for the bow and stern of the boat, together with the new Toe Rails have now been stained and fixed in place. 

The curved piece for the stern split as I was nailing it into place so I had to make a new one. This time I've not used nails but glued it in to place. The boat isn't going into water so there's no need to worry about it getting wet. 

The next step is to stain the whole thing and then give it a good waxing and polish. 


I decided to use a medium Oak stain because I didn't want the hull to be too dark.

The first coat of stain I applied with a brush and was a little disappointed in the brush marks that were visible once it had dried. 

After sanding the hull again, I applied a second coat of stain by wiping it on with a cloth. This gave me a smoother and more even finish.

To finish this stage of the project I applied a couple of layers of wax polish, buffing well between coats. I haven't achieve the mirror like finish I would have liked but the boat has a nice sheen to it, and looks good.


This project will be put away for a while now as I have no idea what to do next. Part of me wants to keep "Maud" as a wooden ornament, as she is now, but part of me would like to do some construction work and make her into a proper model boat. For now she sits proudly atop a cabinet in my study while I research my options and ponder my next step.


Thursday, 17 August 2023

Model boat - starting the rebuild


I've been working on constructing some pieces for the deck. The originals broke and split irreparably as you can see from the first two photo's. I pieced them together and stuck them with masking tape so that I could draw round them onto a new piece of timber. 

I've cut them out and sanded them to shape and they're now ready for staining. On the original boat they were a dark wood and would have contrasted nicely to the light wood of the hull/deck. I've also made new 'toe rails' which also need staining.


Tuesday, 8 August 2023

Woodburning: A Lion


Back to Pyrography. Having attempted a couple of scenes on scraps of wood I decided it was time to buy something more suitable. Thinking about a smooth surface, and also the cost since I am only experimenting at this stage, I bought a sheet of 3mm Plywood from my local DIY store. 

I cut a piece about 8" x 6.5" and smoothed it over with a very fine sandpaper. I used a fine point nib and tried to move the 'pen' over the wood as smoothly as possible. I still had issues with the nib 'catching' in the grain of the wood despite it's super smoothness, so I guess that's something that experience will help with eventually.

Just as when I'm drawing with a Fineliner ink pen I allowed the darker tones to build up by repetition and just kept adding marks to deepen the tones as required.

Since producing this piece I have discovered that Plywood is NOT recommended for wood burning because of it's construction. Man-made woods such as Plywood, Particle board (MDF) and Chipboard contain glues. I may use up my sheet for small and quick practice pieces but for anything serious I need to find a natural wood such as Cedar or Maple, to name just two.

Friday, 28 July 2023

The Surfer


From time-to-time I get the urge to tackle a seriously challenging pencil drawing. When this happens I like to find a subject that has drama or is a little bit out of the ordinary. When looking for a suitable subject I pass over hundreds that just don't shout out at me whether I think they're do-able or not.

I actually fancied doing another stormy sea drawing like the ones I've done previously of the lifeboats or ship in distress. While I was browsing Pixabay (for anyone who hasn't heard of it, it's an amazing copyright-free resource) for a suitable subject I came across a photo of this surfer. It's not exactly a 'stormy sea' but it has the crashing waves and breaking surf and it was definitely shouting out at me. I just couldn't resist having a go at it. 

Oh, and it was certainly challenging.  :lol:

(Drawn on Winsor & Newton Medium Surface Cartridge paper using a 2B mechanical pencil and is 11" x 14")

Friday, 21 July 2023

Small boat


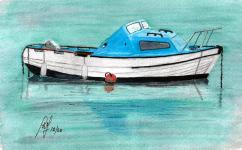
One of the projects, or should I call them 'challenges', that I run in my Art Forum, is what we call the Monthly Painting and Drawing Project. This is where I post a photograph of what I hope is an interesting subject, and the members all paint or draw it in their chosen medium. 

We find it an interesting way of appreciating how other artists 'see' the same subject and how they  apply artistic licence to create their own interpretation of it. Every month I create a web page showing all of the submissions so that we can compare all the paintings/drawings side-by-side. This isn't about deciding whose is best but about learning from our peers and appreciating the achievement of others.

As for the subject of the painting, I saw this small boat bobbing on the water in the marina in Torbay. Torbay is an area of coast known as "the English Riviera". There was just something about it that made me want to paint it and I knew it would make a great subject for the monthly project. 

I couldn't decide whether to paint it or draw it, so I did both. LOL.


Other boat paintings on my web site

Friday, 14 July 2023

The stand for the model boat


I haven't had a lot of time for working on the boat but I have found an hour or two here and there.

Because I have little experience working with wood, especially when it comes to staining and polishing, I decided to work on the stand for the boat first, to get some small experience before tackling the boat proper. It was covered with many layers of thick black paint, as can be seen in the picture on the right. 

Having stripped it down and disassembled it I found many old nail holes, splits and cracks hidden by the paint. I filled the holes with wood filler and glued the cracks as best I could and gave it all a very good sanding. I then reassembled it, stained it and wax polished it. 

Where the uprights fix to the base the nail holes had left horrible scars I couldn't disguise. The only thing I could think of was to cover the bad areas with something decorative. After much thought I decided to use a length of copper pipe. I cut the pipe to size, sawed along it's length, flattened it out and shaped it. After bending two pieces to fit the supports, and filing the edges smooth, I polished them and glued them in place. They look a little odd but much more acceptable than the damaged wood was.

I'm really pleased with the end result but even more pleased that I did this first because I made a lot mistakes along the way .... mistakes I wouldn't want to make on the boat itself. 


Wednesday, 5 July 2023

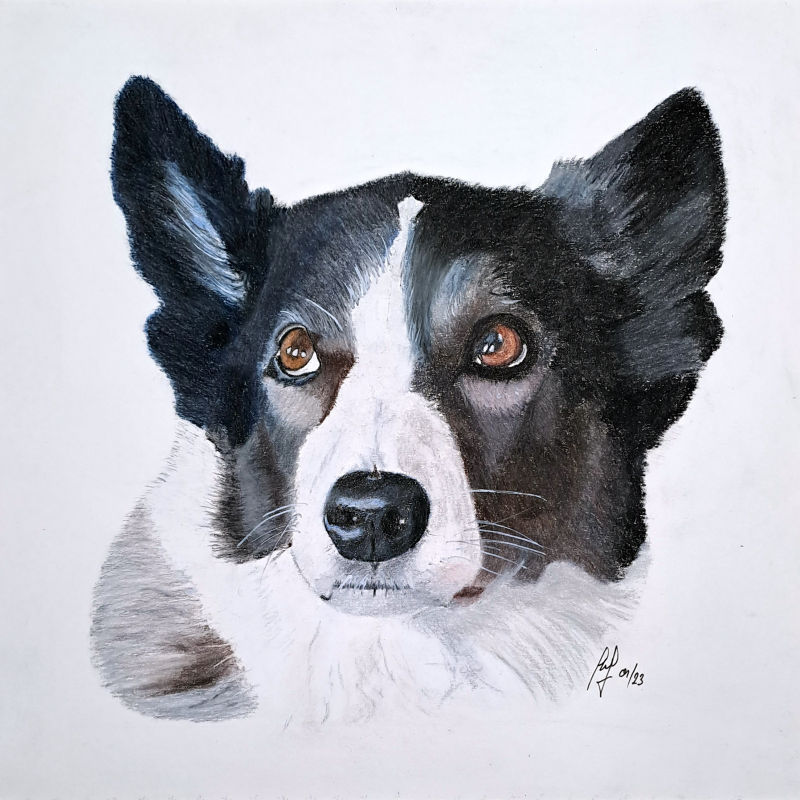
Kiya


A pastel drawing of a Cocker Spaniel dog
"Kiya"

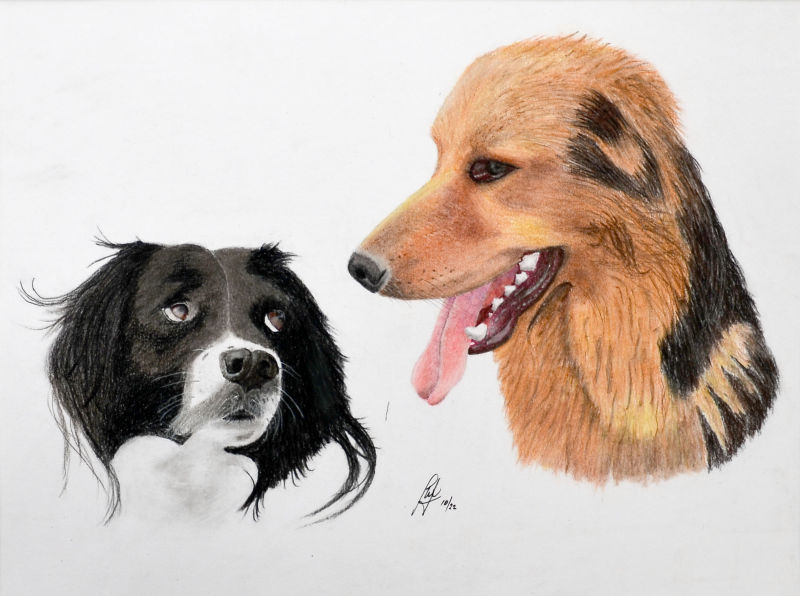
We have a saying here in the UK to describe when an event doesn't occur for a very long time and then all of a sudden it happens multiple times. We say "They're just like buses ... you wait all day for one and then three come along at once". That's what has happened to me with regards to Dog portraits.

A short while ago I was asked to do a double portrait of Rocky and Alfie for a relative. That was quickly followed by a request to paint Buddy for the relatives friend after he'd seen the Rocky & Alfie portrait. When I handed Buddy over to my Brother-in-law for him to give to his friend, he quickly followed it up by asking if I'd do another one for the friends friend. 

This time it is a Cocker Spaniel called Kiya who passed away unexpectedly. Apparently Kiya's owners only had a few photo's on their phone and desperately wanted something better to remember him/her by. Obviously I agreed and sharpened up my pastel pencils.

Previous Dog portraits in pastels

Friday, 30 June 2023

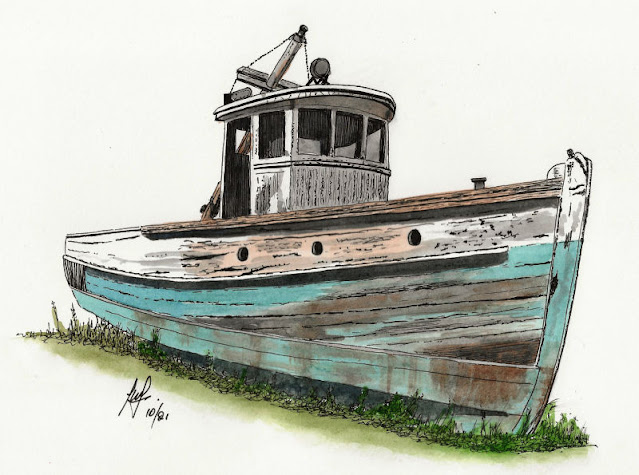
Old fishing boat

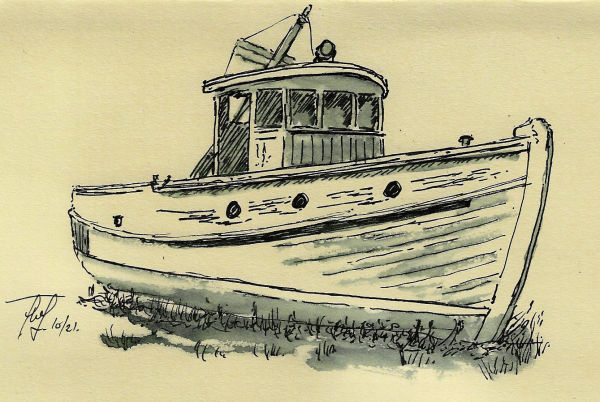
A Pen & Wash painting of an old fishing boat
"Old Fishing Boat" using Pen & Wash


Boats of all shapes and sizes make good subjects for painting and really old, well worn boats are especially attractive. I don't know if this old fishing boat is still in use today as its badly flaking paint, rust stained hull and rotting wooden boards have certainly seen better days. 

My first version of this appealing subject was actually a sketch using a non-permanent pen and a water brush. Though I don't do a great deal of sketching outdoors (which I intend to rectify), the pen and water brush combination makes an ideal, easy to carry, outdoor sketching kit.


Other boat paintings on my web site

Thursday, 22 June 2023

Stamp Collecting

One of my many hobbies is "stamp collecting". I started collecting as a teenager, sticking them into paper albums using Stamp hinges, the way most people start. Though I've gone for decades at a time without ever looking at my collection, I've never wanted to part with it. 

Although I have a few stamps 'of interest' none of them have any real value. Many stamps these days are commemoratives and can be quite large, glossy, and colourful works of art. These are great ways of learning about World History as most significant events around the world are commemorated with an issue of stamps.

These days my stamps are stored in Stock Books, which allow the stamps to be stored loose without attaching them to the page. I have just over 10,000 stamps from 202 countries and I believe this to be what 'real collectors' would call a small collection.

I once asked an online group of stamp collectors what stamps I should collect, which was a silly question, because the answer came back "whatever interests you". Duh!! Why didn't I think of that? But that answer explains exactly why my albums contain many old and damaged stamps that most collectors would throw in the bin. I am much more interested in the age of a stamp than it's condition. I marvel at how a small rectangle of paper can have been licked, stuck on an envelope, man-handled over land, sea and air, stuffed into bags, thrown from container to container, poked through letter boxes in all weathers and eventually discarded ... yet still be intact today, over 150 years later. So if it has a corner missing, a tear, or damaged perforations, so what? It's still worthy of having a place in my collection. Sure, it has no value, but to me that's not the point.