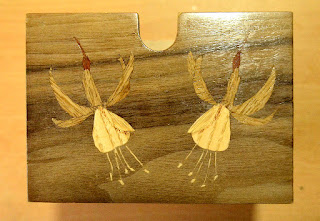
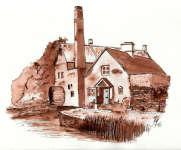
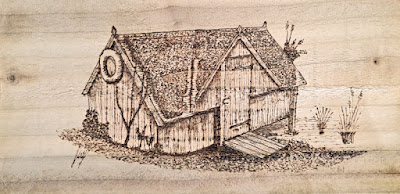
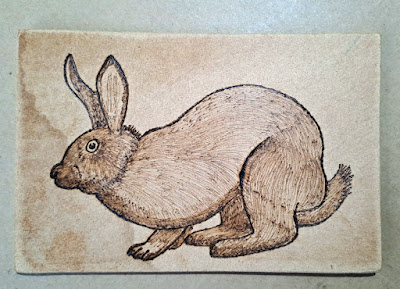
Here are previous posts on Marquetry
Hoping to inspire and encourage those interested in drawing or painting to have-a-go.
Sunday 19 March 2023
Flowers design for drawers
Wednesday 15 March 2023
Nothing ventured....
I did this Pen and Ink Wash drawing some years ago. Although it hangs on the wall in my study, it has been largely forgotten, which is a shame because it was one of those special, 'first attempt' revelations, like we've all had at various stages along our art journey. Rather than write about it again, the experience for me can be summed up by the opening and closing comments I made at the time on my Work-In-Progress page.
I begin:-
I've never tried using ink washes but it's something that appeals, probably because of my love of Pen and Ink. I haven't done any research nor watched anything on YouTube so I'm very much making this up as I go along. What I've decided to do is draw a building using Fineliner pens and then add shadows and shading using diluted ink applied by brush. I have no idea how it's going to turn out ... could be a disaster.
and I close:-
Well, what a learning experience that was. Like every 'new' medium we try, the unexpected can be a pain or a joy. Overall, though there are many things I've learned about working with ink, this experience was more joy than pain. The way the neat ink bled into wet pale washes was superb. A few areas are darker than I wanted but learning to control the ink was half the fun, and I love the way some patches have purple hues in them. This is certainly something I will do again and I'm keen to try different inks .... Sepia might give some interesting results.
Thursday 9 March 2023
Harley Davidson
Having gone through a long spell of not drawing anything significant, I fancied trying something challenging and something that I haven't tried before. I've always liked the way silver and chrome can be easily replicated using graphite pencils and I had the urge to find a chrome subject to play with. I couldn't get inspired by the numerous pictures of silver teapots, cutlery, and shiny ornaments but I eventually found something that hit the spot. I chose this picture of a classic Harley Davidson motorbike.
The picture isn't very large. I decided on A4 size (8.3"x11.7") Daler Rowney Smooth Cartridge paper and it's the first time I've used it. For a smooth paper it took many layers of graphite quite well. With the benefit of hindsight I wish I'd used something larger but that's only because it might have made some of the complex areas a little easier. For anyone interested I've put a better explanation and a step-by-step Work In Progress page on my main website.
Sunday 5 March 2023
Pyrography - Second attempt.
Thursday 2 March 2023
Trying my hand at Pyrography
Thursday 23 February 2023
Iris
Friday 17 February 2023
Second attempt - A different technique
I've now had a second go at marquetry using a different technique. Without getting technical, the first one was done using the "window" method and this one using the "Double Bevel" method. This technique involves cutting two veneers at the same time, but that ensures the shapes fit together better, with much fewer gaps and a much tighter fit. So that I had a sound comparison between the two methods I used the same Robin picture as before, but reversed. What I hadn't expected (though I should have) was the huge effect the veneer choices had. The two Robins look quite different from each other and although I'm happier that this piece is more technically sound, I prefer the overall look of the first piece despite its faults. Lots to learn, that's for sure. ;)
Tuesday 14 February 2023
Marquetry - my first attempt
I've always liked the look of wood, especially polished wood with pronounced grains. I have a very old wooden model boat that I wanted to restore and while researching online how I could strip it back and polish it up, I stumbled across Marquetry. Though I put it out of mind initially, the idea of making pictures from wood veneers kept niggling at me. Obviously it was an itch that just had to be scratched.
Many hours were spent watching online video's and reading articles on the subject, but I've never been one to learn that way. I'm very much a hands-on, trial-and-error, figure-it-out-as-you-go sort of guy, so I sent for a small pack of mixed veneers so I could have-a-go. Though many sites suggested very simple shapes to begin with, I thought I'd learn more by trying something a bit more testing.
From my own collection of photos I chose a picture of a Robin that I've painted and drawn many times, and I traced over it just in very approximate outlines. I played with various veneers considering the direction the grains should run and the overall 'tonal value' of the wood. Viewing the photo in greyscale helped a lot when choosing lights and darks.
There are a number of different techniques with Marquetry. As a beginner I chose the "Window" method as it looked the easiest. The first thing I learned when cutting is how easily the knife slices through the wood when going with the grain, but how hard it can be when cutting across the grain. Cutting irregular shapes proved harder than I'd expected and the very thin veneers often split. I'm hoping experience will help me get better at that.
Finally I had all the pieces taped together and I glued the whole thing onto a scrap of wood. I gave it a good sanding and several layers of Shellac varnish to finish it off.
 |
Though this isn't an accomplished piece of work, I'm not disappointed in it. The gaps between the various pieces leave much to be desired and the veneer choices could have been better, but I learned so much from the process. Next I will try a different method to see if that suits me better. If YOU have experience of Marquetry I'd love to hear from you.
As for the model boat.... I'll be covering that in a future post.
Saturday 11 February 2023
A change of emphasis
Saturday 29 May 2021
Hobbies A1 Treadle fret saw
When clearing out my fathers attic I came across a few parts of his old treadle saw. I recognised it instantly and very fond memories of watching him use it flooded my mind. I searched his loft space for the rest of the saw and was delighted to find every part.
As a young boy I remember watching my father pedalling away as he skilfully turned the wood to cut out various shapes and patterns. Many a toy was made by him .... castles, garages, farms, dolls houses, jig saws, etc. Dad used to sit at this saw pedalling away for hours on end.
Once I had the various parts of the saw back home I laid them out and tried to figure out how they all fitted together. It was a bit of a puzzle but I managed to assemble it. As expected, it was no longer in workable condition.
So what to do with an old 1940's fret saw that doesn't work? Easy! I used wire-wool to remove the small bits of rust and polished it with a wax polish to restore it's shine and give it a protective coat. I fashioned a few new wooden components and gave them a varnish just to make it look complete and functional. Then ...
... I stood it in my garden.
I'm well aware that over time the weather will take it's toll and the rust will eat it's way back into the metal, but in the meantime, every time I step into my garden I see it standing there and my mind races back to when I was a boy watching dad knocking together the next thing for me to play with.
