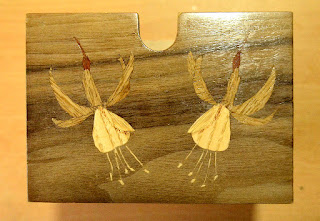
Here are previous posts on Marquetry
Hoping to inspire and encourage those interested in drawing or painting to have-a-go.
Here are previous posts on Marquetry
I've now had a second go at marquetry using a different technique. Without getting technical, the first one was done using the "window" method and this one using the "Double Bevel" method. This technique involves cutting two veneers at the same time, but that ensures the shapes fit together better, with much fewer gaps and a much tighter fit. So that I had a sound comparison between the two methods I used the same Robin picture as before, but reversed. What I hadn't expected (though I should have) was the huge effect the veneer choices had. The two Robins look quite different from each other and although I'm happier that this piece is more technically sound, I prefer the overall look of the first piece despite its faults. Lots to learn, that's for sure. ;)
I've always liked the look of wood, especially polished wood with pronounced grains. I have a very old wooden model boat that I wanted to restore and while researching online how I could strip it back and polish it up, I stumbled across Marquetry. Though I put it out of mind initially, the idea of making pictures from wood veneers kept niggling at me. Obviously it was an itch that just had to be scratched.
Many hours were spent watching online video's and reading articles on the subject, but I've never been one to learn that way. I'm very much a hands-on, trial-and-error, figure-it-out-as-you-go sort of guy, so I sent for a small pack of mixed veneers so I could have-a-go. Though many sites suggested very simple shapes to begin with, I thought I'd learn more by trying something a bit more testing.
From my own collection of photos I chose a picture of a Robin that I've painted and drawn many times, and I traced over it just in very approximate outlines. I played with various veneers considering the direction the grains should run and the overall 'tonal value' of the wood. Viewing the photo in greyscale helped a lot when choosing lights and darks.
There are a number of different techniques with Marquetry. As a beginner I chose the "Window" method as it looked the easiest. The first thing I learned when cutting is how easily the knife slices through the wood when going with the grain, but how hard it can be when cutting across the grain. Cutting irregular shapes proved harder than I'd expected and the very thin veneers often split. I'm hoping experience will help me get better at that.
Finally I had all the pieces taped together and I glued the whole thing onto a scrap of wood. I gave it a good sanding and several layers of Shellac varnish to finish it off.
Though this isn't an accomplished piece of work, I'm not disappointed in it. The gaps between the various pieces leave much to be desired and the veneer choices could have been better, but I learned so much from the process. Next I will try a different method to see if that suits me better. If YOU have experience of Marquetry I'd love to hear from you.
As for the model boat.... I'll be covering that in a future post.